I cook a lot from scratch, and always prefer to use fresh produce rather than canned or frozen. With our CSA share and at least two farmers’ markets within easy walking distance, we end up with quite a pile of cores and vegetable peels by the end of the week.
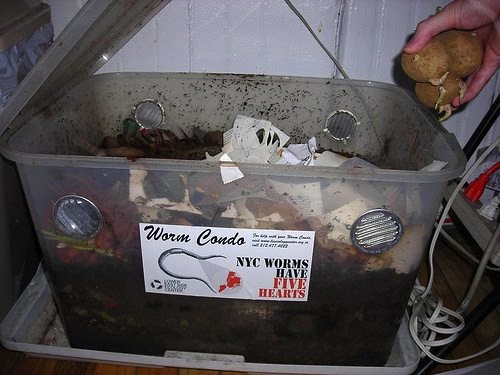
The idea of sending organic materials to the landfill (where it can take years or even decades to break down) has always made me very uncomfortable. When we first joined the CSA, and I saw how much fresh produce we were actually going to get each week, I started looking for a local community garden that would compost food scraps. When I couldn’t find one close enough, I decided to take a class on indoor composting that was offered by the Lower East Side Ecological Center. At the end of the class, I picked up a worm bin and some “starter” worms, and marched on home to give it a try.
When I first set up my worm bin, I was convinced that it would be difficult to keep the required healthy balance that would make the worms happy and keep the bin from smelling. It ended up being much easier than expected–we’ve rarely smelled the bin. Our main difficulty was, and still is, keeping the moisture in the bin at an ideal level. Luckily, the worms have been pretty forgiving, and, much to the excitement of our cats, let us know know if something isn’t right by climbing up the sides of the bin walls. Though we haven’t had any major catastrophes, I would definitely say that worm bin wrangling isn’t necessarily for the squeamish. Luckily, I like worms.
Setting up a worm bin:
There are many variations on indoor vermicomposting (worm composting), and plenty of fancy worm composting kits available for those who don’t want to make a bin. I bought mine directly from the Lower East Side Ecological Center after I took my class, but getting starting a worm bin can definitely be a very simple, inexpensive weekend project.
What you need:
1. Giant plastic storage bin with a lid. My bin has a latching lid, which seems to sufficiently cat-proof the compost
2. A handful of gravel to sprinkle in the bottom (worms need this to digest)
3. A pile of newspapers
4. A bowl full of water
5. Red wiggler composting worms
Poke a bunch of small holes around the top of the bin for circulation (a drill with a very small bit works great for this). If you want to make larger holes, you may also want to use metal screens to cover them, so your worms don’t escape. Drill several smaller holes in the bottom to drain any extra liquid (we have an extra container lid under our bin to catch any runoff). Sprinkle the gravel around the bottom of the bin. Next, tear newspaper in to long strips about 1-2″ wide, and soak them in the bowl of water. Squeeze them out until they’re just barely damp. Separate the strips and fluff them in the bin. Fill the bin 1/2 to 3/4 to the top with the damp strips. Add worms. Starting off slowly, add non-fatty food scraps to the bin. Once your worms are settled and the bin gets going, adjust the quantity of food scraps until you find out how much they are able to eat in a week. Add more newspaper bedding as needed.
What to feed them:
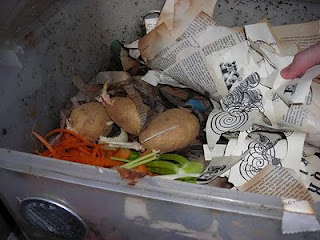
Worms like fruit and vegetable peels and scraps. Exercise caution when composting anything fatty or cooked. I avoid fatty/prepared foods altogether, but I know that it works out just fine in small quantities for some people. I also mix my credit card receipts and other sensitive documents into the bedding–it’s pretty much guaranteed that they won’t fall into the wrong hands if my worms are eating them.
What do you do with the compost?
When harvesting the bin, the nutrient-rich compost can be used for a variety of things. I like to mix some compost in with the soil of each of my houseplants (instead of chemical fertilizers/plant food). After our next harvest, I also plan to take some to the trees/flowerbeds in my local park, and will put up signs in my neighborhood offering it to other local gardeners. If there is any left, I’ll contact some local farmers and offer it to them as well.
Problems we’ve had, and what we did to fix them:
There are tons of great resources available for indoor composting that explain how best to set up healthy bin. I found these to be particularly helpful when I was setting up mine:
http://www.nyccompost.org/how/wormbin.html
http://organicgardening.about.com/od/compost/ss/setupawormbin.htm
http://en.wikipedia.org/wiki/Vermicompost
**If you click through a link to Amazon.com in this post, I will make a little money if you make a purchase. Don’t say I didn’t warn you.**


