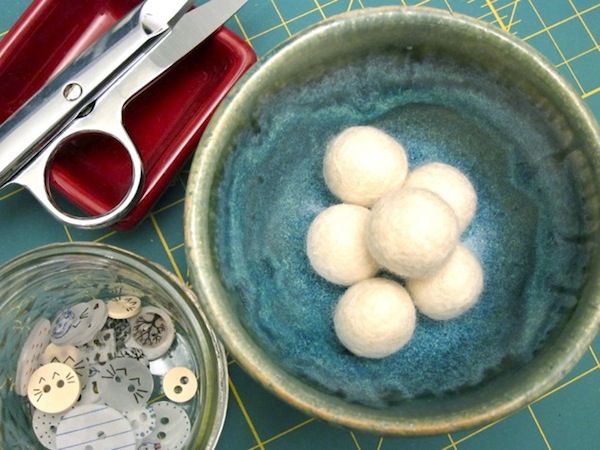
For a recent project, I needed a whole pile of fairly uniform felted wool balls. I thought it would be easy enough to make my own—I’d seen quite a few tutorials kicking around the crafty blogosphere—but no matter what method I tried, I always seemed to end up with the same ugly ridges, cracks and creases. In my frustration, I started experimenting with different combinations of felting techniques, and finally stumbled upon the answer for creating perfect round felted wool balls, with no washing machine or wool yarn core required!
Supplies:
* Wool roving, dyed or natural
* Detergent, mild and unscented
* Hot water
Tools:
* Needle felting needles (I used a Clover needle felting tool.)
* Needle felting mat or foam pad (I used a Clover needle felting mat.)
* Large bowl or washtub
* Towel
Step 1
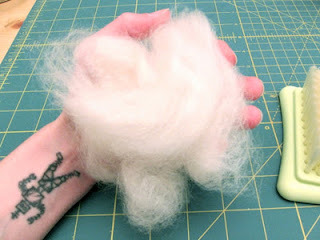
Gather a large handful of wool roving, fluffing and separating the fibers.
Step 2
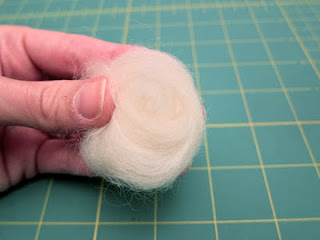
Wrap the roving into a tight ball. (There will be some flyaway fiber at the beginning of the process, so don’t expect immediate perfection!)
This ball will be about twice the size of your finished felted ball.
Step 3
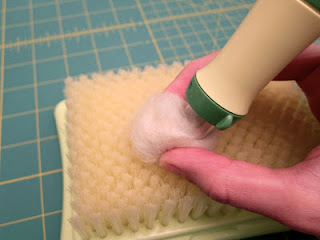
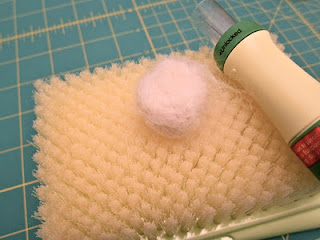
Place the balled fiber onto the felting surface. With a felting tool or felting needle, begin to intertwine the fibers and fuse them together by poking the needle into the center of the ball.
Step 4
Continue working your way around the ball, smoothing any loose fibers down and poking them into place. In areas where layers of roving overlap, take special care to poke the layers together until the surface is smooth and uniform, and no evidence of the overlap remains. (This will prevent ridges and gaps from forming in your finished felted balls.)
When your needle felted ball is round and has a mostly smooth surface, you’re ready to move on to water felting.
Step 6
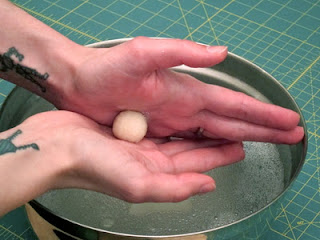
Add a few drops of gentle detergent to the bottom of a large bowl, then fill it with the hottest water that your hands can safely stand. Dip a needle felted ball into the water and begin to roll it lightly between your palms in a circular motion. As the fibers fuse, periodically return the ball to the water bowl, then continue rolling, increasing the pressure of your hands slightly as the ball becomes firmer. The rolling process will take at least one to two minutes per felted ball.
Note: When you first start rolling, resist the urge to press hard—this could create creases on the surface of your felted ball.
Step 7
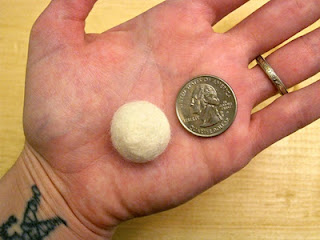
When the surface of your ball is completely smooth and uniform, the felting process is complete. Squeeze any water out of the ball, then press the ball in a towel. Once excess water is removed, roll the ball in your hands one last time to round it out, then allow it to dry for at least 12 hours before using.

I've been wanting to try out felting for a while now but didn't know how… guess now I have no excuse! Thanks…and love that robot tattoo : )
Definitely do yourself a favor and pick up the felting tool–it really helped me get the hang of it.
Someday, I'll have to post a video of my wrist robots doing the robot–I've got one on each side. :)
Friend of mine led me here… Great article, I'd been thinking about trying different techniques, and I'm glad you decided to blaze that trail first!
I did this with great success. I had a bunch to do, so I did it over the stove, so I could keep my water hot.
Also, I did a little experimentation and added another step:
If you want your felt balls to be tighter / more dense, have a cup of super-icy water handy. Once you're done shaping the ball, dunk it in the ice water for just a second or two to shock it.
Remove excess water, etc. as per above.
I've bookmarked this one! I still get the best results using a washing machine and old pair of panty hose but when small size and uniformity are required, this looks like a great solution! Thank you.
Thanks for the shocking tip–I've done that when water felting a sweater on the stove, but I didn't even think about it for the felted balls. Thanks for sharing!
I live in a Brooklyn shoebox, so a washing machine would require a trip to a laundromat. That's actually why I ended up trying this method–I couldn't find a good tutorial that didn't require one. :)
BTW: I make great balls of Felt without the felting surface/needle/tool… so if you don't posses them, don't be put off. Keep up the good work : )
Those ugly yellow dish washing gloves work great too. (dollar store) Wear them while you roll the balls. They have texture nubs on the palms and fingers that seem to really scrub up the fibers fast and you can stand really hot water while wearing them!
So true!
Hi — spent a big part of my day using water technique and ended up with a lot of those balls with creases and folds. I wondered about using the needles, but I have already used hand soap, hot and cold water. Do you think I could start the process over with the balls already created?
Once the balls have already been felted, I’m not sure there’s much more you can do–especially if the balls are firm/dense enough to break needles. If the balls aren’t too dense, you could try adding a smoother layer on top with needles, then water felting again per the instructions above. I’ve never tried it that way, though, so I’m not sure what kind of results you’d get.
If you figure out something that works, let us know!
Thank you! I’ll try adding the layer on top. I’ve made 100 in 10 colors so I might just need to use them as the garland I intended them to be for and try this again with your process another time.
Thanks for sharing your Felt ball tutorial, there are so many crafting ideas using these ♥
http://felting.craftgossip.com/2012/11/24/tutorial-perfect-felted-wool-balls-and-beads/#
Definitely the way to go is to use a thin layer of wool over the outside after you’ve formed the ball to avoid the cracks. I create my balls entirely by hand – no needles, dryers, etc. needed. After I have my initial shape going, I go back and do another pass with a thinner layer to fill everything in. I found a really good tutorial here for filling the cracks in, if you’re interested! http://www.cookquiltmakeandbake.com/2012/11/24/make-felted-ball-garland/
That tutorial from Cook Quilt Make and Bake is definitely good! I shared in on CRAFT a while ago, and I definitely plan to give her method a try in the future. The results look really nice. :)
Thank you so much for the fabulous tutorial, I have used it numerous times since and made two beautiful little-girl necklaces. Here’s one of them in progress: http://farm9.staticflickr.com/8197/8250501168_c5fb45731a.jpg
Thanks again for taking the time!!!
The needle felted heart is too cute–thanks for sharing! So glad the tutorial has been helpful. :)