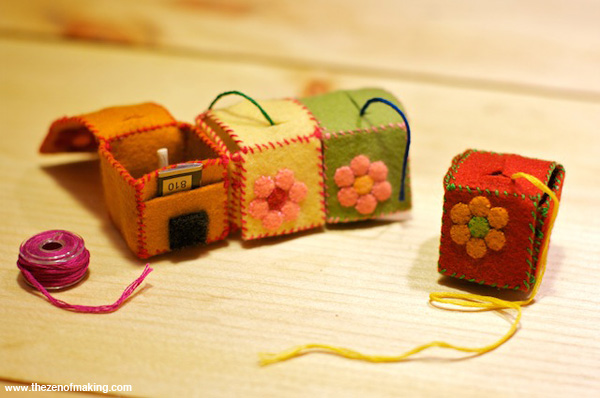
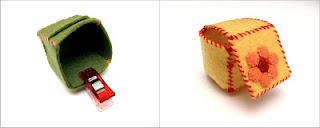
Organized embroidery floss. On the go. No knots, no tangles—even if it’s bouncing around all day in your bag. (No, seriously.)
Inspired by a conversation with fellow CRAFT writer (and embroidery goddess) Rachel of Average Jane Crafter, I designed this project specifically for needlework geeks who like to stitch on the go. Each embroidery floss travel box holds up to two different colors, has a front pocket to hold floss color tags, and has a bobbin feeding system for quick floss access with no tangles. (Huzzah, no knots on the subway!)
Are you a yarn crafter too? Check out my modular colorwork yarn holders on CRAFT to keep multiple colors of yarn organized and untangled when knitting or crocheting on the go!
Supplies:
* High quality felt, ½ sheet of the primary box color, ¼ sheet each of two contrasting colors
* 1 bamboo skewer or chopstick
* Embroidery floss, at least 2 colors (for box construction)
* Embroidery floss, 1 or 2 colors (to load onto bobbins for projects)
* 2 plastic sewing machine bobbins
* 1 Velcro closure, ½ ” circle or square (or cut to size)
* Fabric-friendly adhesive (I used Amazing E-6000)
Tools:
* Hand-sewing or embroidery needle
* Small steel crochet hook, size 12
* Paper hole punch
* Fabric scissors with detail tip
* Paper or kitchen scissors/clippers (to cut bamboo)
* Sandpaper
The following tutorial creates ONE box. Gather additional materials to make multiple boxes.
Step 1
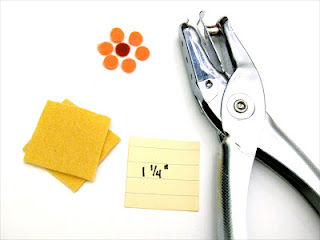
Using fabric scissors, cut the following shapes out of the primary felt color: seven 1¼” felt squares and one 1¼” x ¾” rectangle. In the contrasting felt colors, use a paper punch to punch six small felt circles for flower petals and one small felt circle for the center.
Step 2
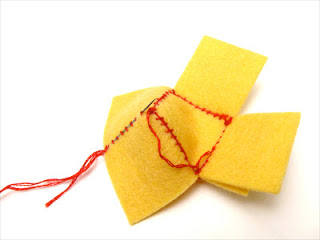
Begin constructing the box by attaching the sides to the bottom.
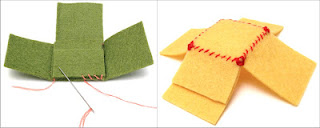
To do this, select a felt square for the bottom of the box, then attach the first side by laying a second felt square on top of it and whipstitching the squares together along ONE of the outside edges using 2-ply embroidery floss. Once stitched in place, open the attached side to get it out of the way, then line up the next side with the bottom of the box and repeat the same process. When the first three sides have been attached, stack the the 1¼” x ¾” rectangle on top of the fourth side, lining up the bottom of the rectangle with the edge that will be stitched to the bottom of the box. Whipstitch through all three felt layers to attach the fourth side to the bottom of the box.
When you’re finished, all four sides should be attached to the bottom of the box. Knot off on the inside of the box and trim any extra floss length.
Step 3
Connect the sides to create the walls of the box.
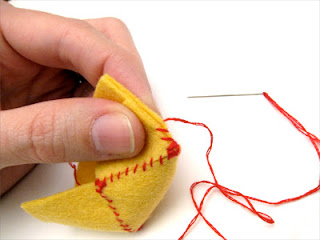
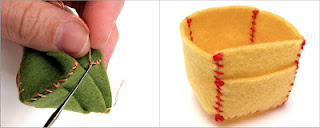
Using 2-ply embroidery floss, line up the first two sides and whipstitch them together. I stitched a couple of extra loops at the bottom and top for added stability.
Step 4
Once you’ve stitched the first two sides together, slip your needle and floss under the stitches of the side and bottom seams on the inside of the box to move the needle to the next corner. Repeat the process for all four sides, working each seam from bottom to top. (At the corners where the rectangle is attached, include the sides of the rectangle in the side seams, creating a pocket.)
Once you’ve finished the last side seam, bring the needle and floss back down under the stitches, then knot off at the bottom corner of the seam on the inside of the box.
Note: I used one long piece of embroidery floss (20″ or so) for steps 3 and 4. If that much floss will tie you up in knots, feel free to use shorter lengths and knot off as needed.
Step 5
Once your side seams are sewn, trim off any excess floss length, then use a small embroidery hook to secure the ends under stitches on the inside of the box. When you’re done, the bottom of your box should have three regular sides and one side with a floss tag pocket.
Step 6
Sew the flower applique in place.
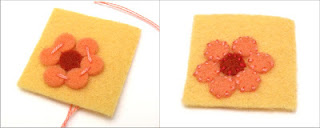
Arrange the flower applique pieces on one of the two leftover felt squares, loosely tacking each piece in place using thread or embroidery floss. Then, using tiny straight stitches, stitch around each circle, knotting off after each one.
When you’re done, pull out the length of thread that you used to tack the pieces down, then trim any excess floss after the knots.
Step 7
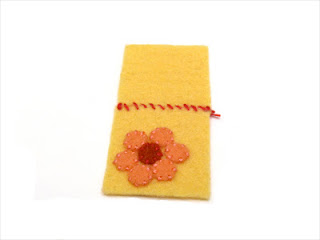
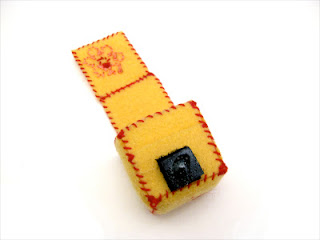
Create the top flap for the box by whipstitching the appliqued square to the remaining felt square along one edge. Knot off.
Step 8
Attach the top flap to the box.
Insert the flap piece into the box with the appliqued/stitched side facing up, lining up the top edge of the non-appliqued square with the top edge of one side of the box. (The flap should be attached to the side that is opposite the floss tag pocket.) Whipstitch the edges together and knot off.
Once the top flap is attached, whipstitch around the outside edges of the flap. Knot off, then secure all ends under stitches on the inside of the box.
Step 9
Using a strong fabric-friendly adhesive (I used Amazing E-6000), attach one side of a Velcro closure to the bottom edge of the top flap, then attach the other side of the closure to the bottom edge of the box, making sure the two sides line up. Allow to dry completely.
Step 10
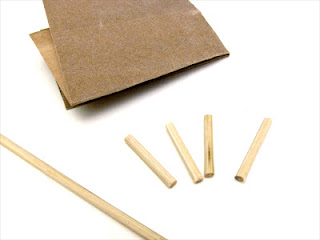
Using kitchen scissors or clippers, cut a 1″ long piece from a bamboo skewer or the narrow end of a chopstick, smoothing any rough ends with sandpaper.
Step 11
Center the bamboo piece on the bottom of the box, gluing it in place with a strong adhesive. (Again, I used Amazing E-6000.) Hold the bamboo piece in place by hand until the glue sets, then allow it to dry completely before moving on to the next step.
Note: Before I glued my bamboo piece down, I put the fuzzy side of a Velcro square on the bottom of the box because I thought the texture might help the wood stick better. I don’t think it made much difference once the glue dried, so feel free to skip it.
Step 12
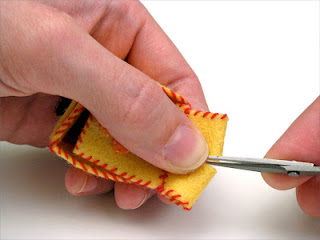
Using fabric scissors, fold the top (non-appliqued) square of the flap in half horizontally, then cut an opening for the floss down the center.
Step 13
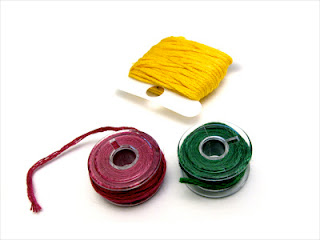
Wind embroidery floss around two standard sewing machine bobbins.
Step 14
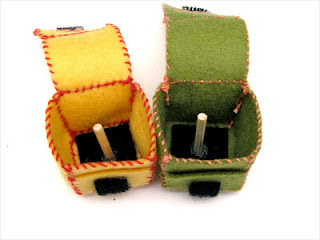
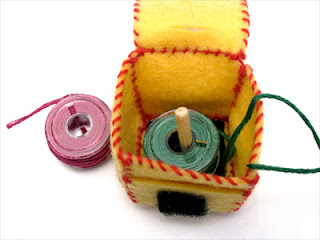
Using the bamboo piece as a guide, load the bobbins into the box.
You can load each box with two bobbins that are the same color, or combine bobbins with different colors for more choices on the go.
Step 15
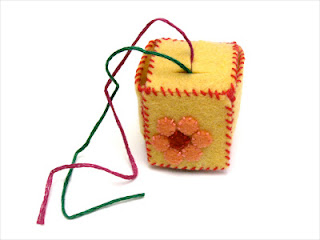
Thread the ends of the embroidery floss through the opening on the top of the box for easy access on the go, then tuck them back inside to keep things neat when not in use.
Enjoy your tangle-free travels!

This is a great and adorable idea!
just splendid!
Such a cute and wonderful idea! Thanks for the tutorial.
Thank you!
Thanks, ladyfriend! If you make some, send pics. :)
Thanks! Crafting on the subway gives a gal all sorts of travel organization ideas. ;)
I will…but um..your skills are just amazing and would be tough to be recreated. but I will try….I vote you write a book on all of the goodies you've made!!
Haley this is genius! And cute! Awesome idea and tutorial, I'm going to have to make some of these for my sewing bag :)
Aww, you're making me blush!
As for the book–somebody should drop Random House a line. ;P
Thanks so much! Don't forget to share photos when you do.
I'm going to try this with my Baker's Twine!
hmm…
Started this project last night at a "Stitch 'n Bitch" evening with friends. Loving it! Still a few steps to finish, but here it is when it looks like a box. Thanks for this great project!
Preciosos trabajos! Felicitaciones!
super, je vais en faire plein, pour mes petits enfants, pour qu’ils puissent ranger leurs petits jouets ( style lego ) encore merci
bonne soirée
Es una idea genial. Especial para llevar ayudantes de costura en el bolso de viaje…
Lo de incorporar las bobinas, me encanto!
Gracias!!!!
This is the cutest thing I have ever seen. And practical. I love it!!
Great idea! Thanks for sharing. I guess that my daughter will like your idea. She loves sewing and hands embroidery.