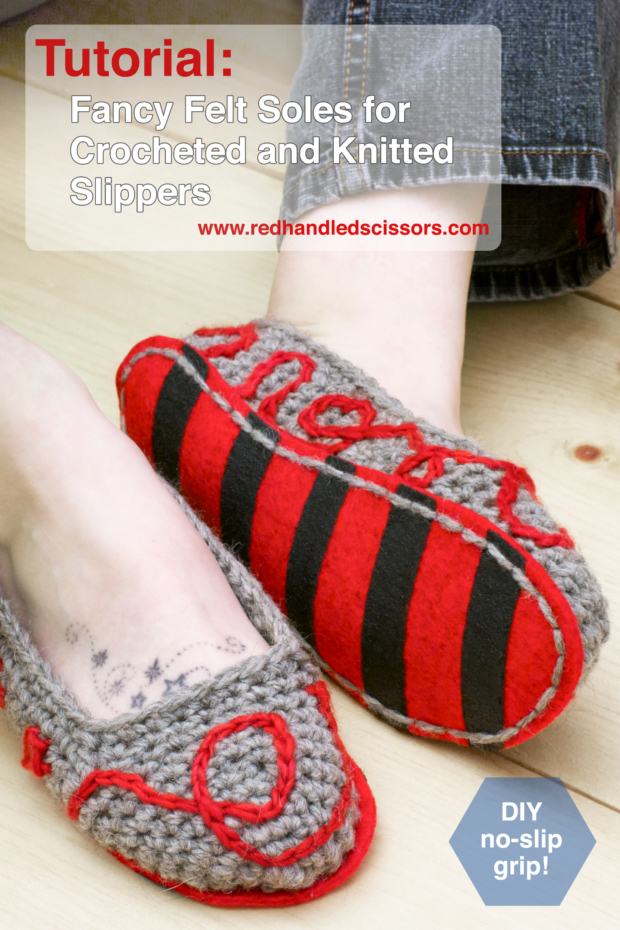
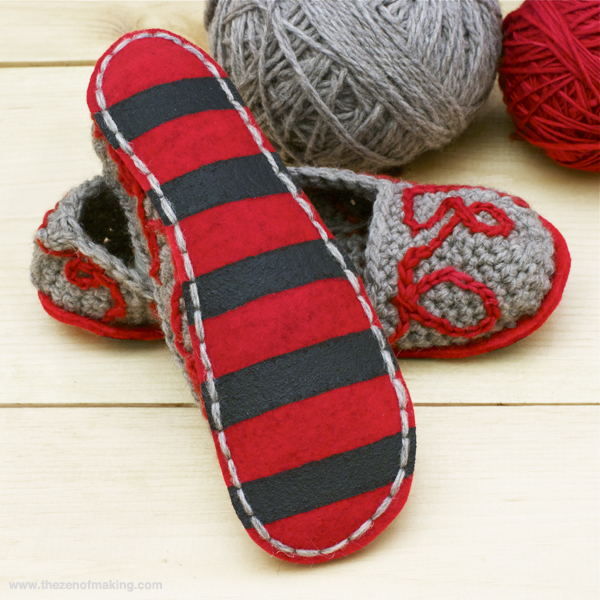
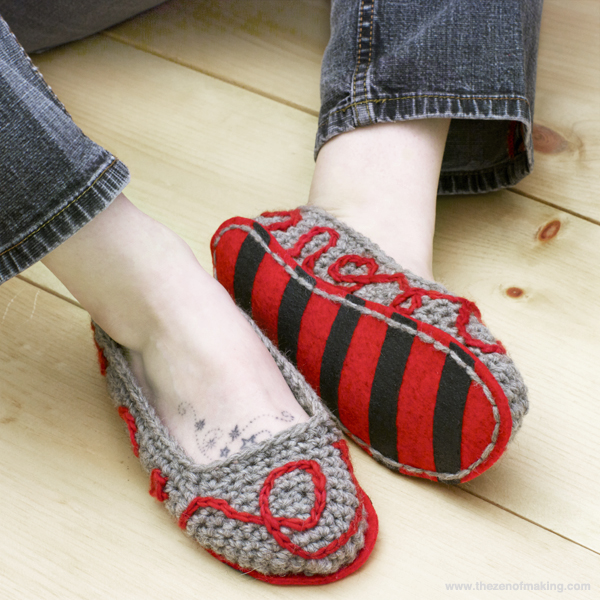
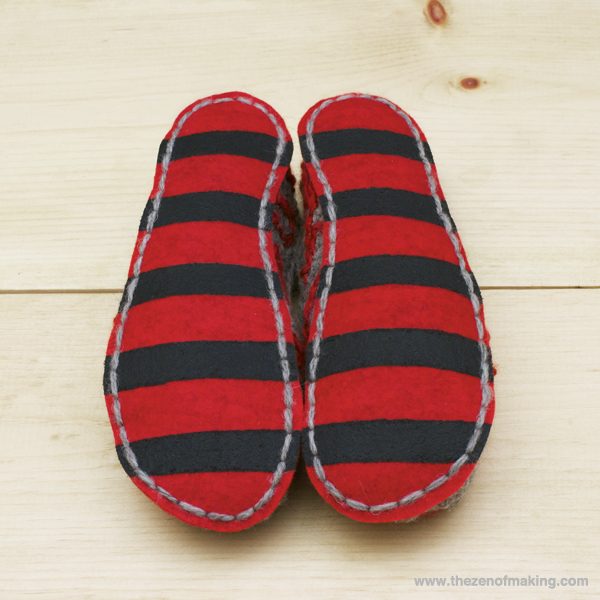
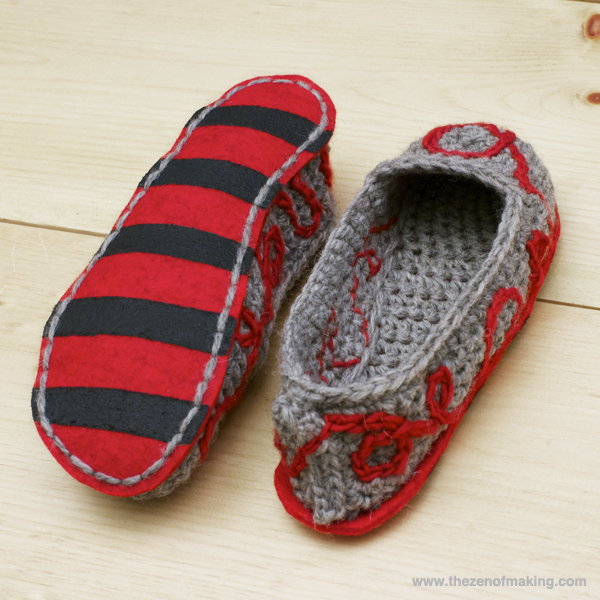
Add fancy felt soles with no-slip grips to your favorite crocheted or knitted slippers!
Crocheted slippers are one of my favorite cozy DIY projects. But, since I work out of my home studio, mine always get a whole lot of wear. (That’s great for my toasty toes, but not so awesome for the yarn under my feet.) So to protect my handmade work—and to prevent slips on hardwood and tile—I made a set of custom slipper soles, and now you can too. Make a pair of your own with this fancy felt sole tutorial! (For the knit-and-purl crowd, this tutorial will work with knitted slippers too.)
Supplies:
* A pair of crocheted or knitted slippers
* A pair of well-fitting shoes
* Several large sheets of scrap paper (plain copy paper works fine)
* 3mm thick wool felt (an 18" x 18" piece should be plenty for most shoe sizes)
* MATTE® dimensional fabric paint, one 1.25oz tube
* Bulky-weight yarn in a contrasting color, 2-3 yards
Tools:
* Permanent marker
* ⅛" paper punch
* Leather punch or tailor’s awl
* Fabric scissors
* Paper scissors
* Sponge brush
* Masking tape
* Chalk pencil
* 16-20 safety pins
* Darning needle
* Ruler
**Please note that the links provided above are affiliate links, and I will be compensated if you choose to make a purchase after clicking through.**
Want to make a pair of slippers just like mine? Here are the tutorials that you’ll need to get the job done:
Step 1
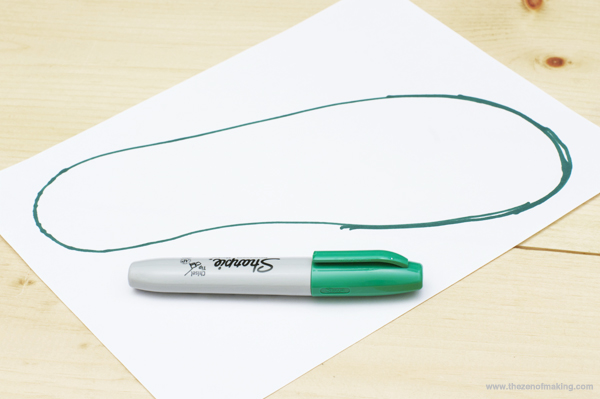
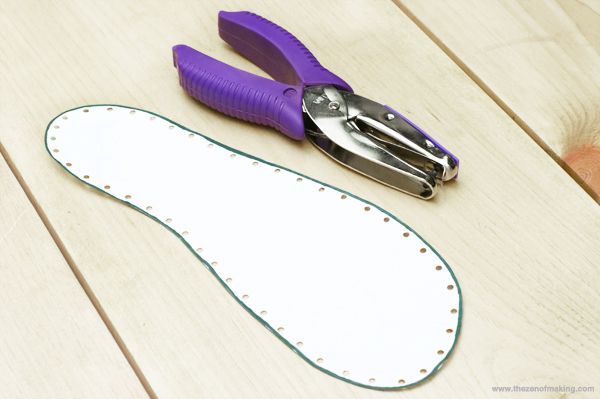
Grab a pair of well-fitting shoes, then use a marker to trace the shape of the sole onto a piece of scrap paper. Cut out the template with a pair of paper scissors.
Note: If your soles are particularly chunky or wide, make your template slightly smaller by measuring in ½" or so from the edge and marking a new line all the way around the sole. To make sure that the re-sized template will fit, ensure that your bare foot fits within the new line before cutting it out.
Step 2
Starting ⅛" in from the edge, place a dot every ½" around the edge of the sole. At each dot, punch a hole in the paper using the paper punch.
Step 3
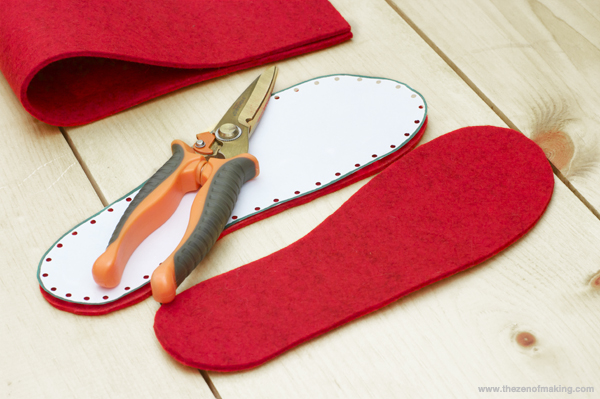
Trace the template you created in steps 1 and 2 onto the wool felt, then flip the template over (for the opposite foot) and trace that onto the felt as well. Cut out each sole with fabric scissors.
Step 4
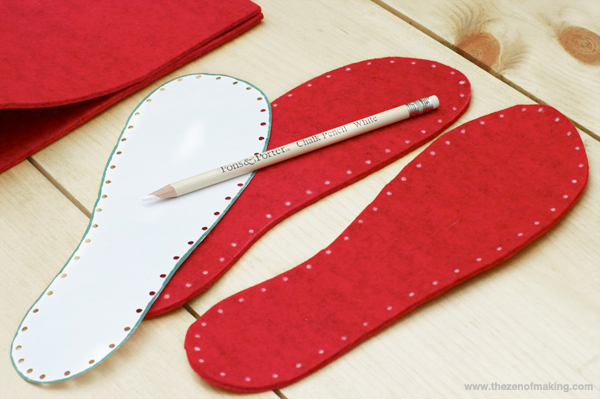
Place the template on top of each sole. Mark each hole around the sole with the chalk pencil. (Use a twisting motion with the pencil to make marks on the felt.)
Step 5
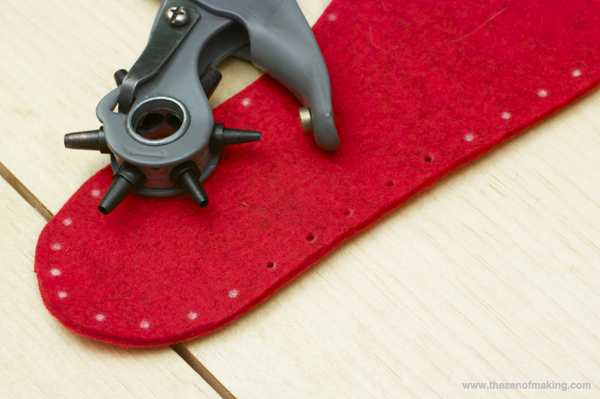
Use the leather punch or tailor’s awl to punch a hole at each mark from step 4.
Step 6
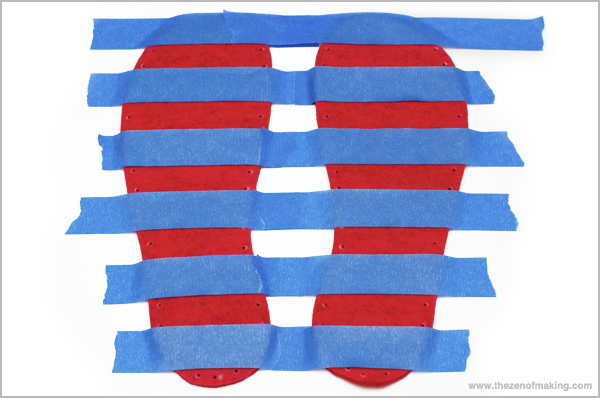
Arrange both soles on top of a layer of scrap paper, then use masking tape to create lines on each sole.
Step 7
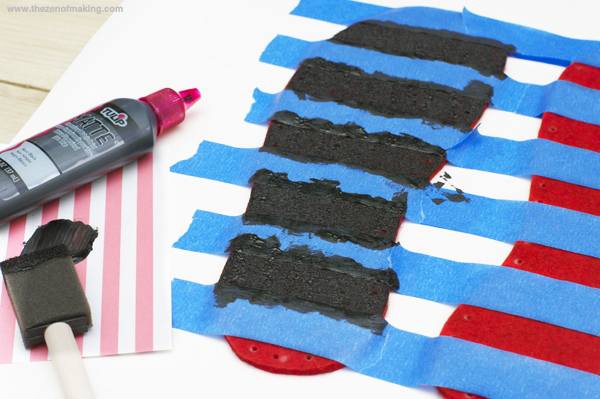
Use the sponge brush to apply a thick layer of fabric paint to each exposed line. Apply 4 layers of paint in total, allowing the paint to dry for a few minutes between each layer.
Step 8
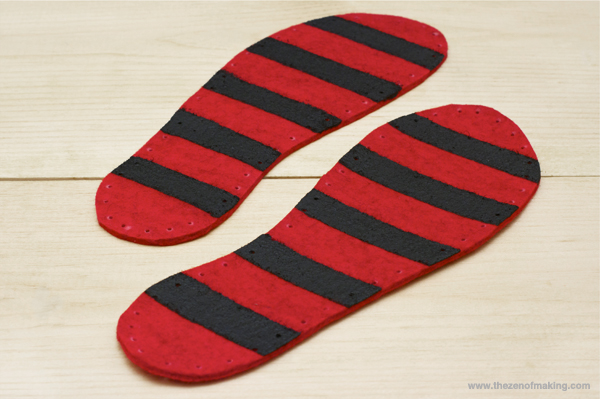
Let the paint dry overnight before moving on to the next step.
Step 9
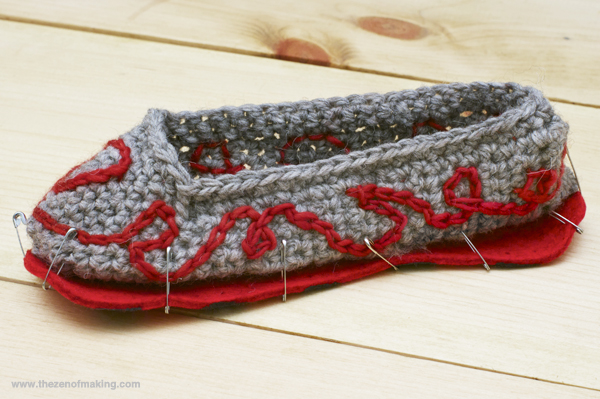
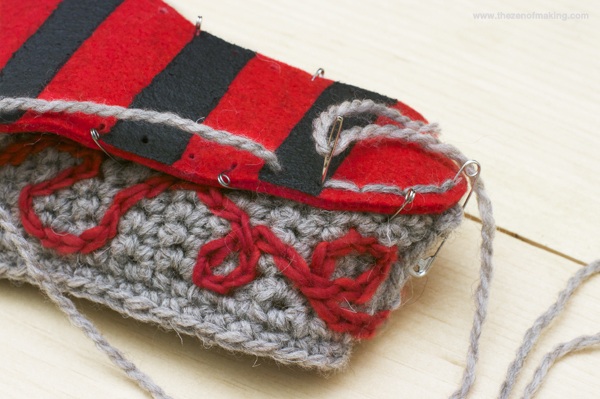
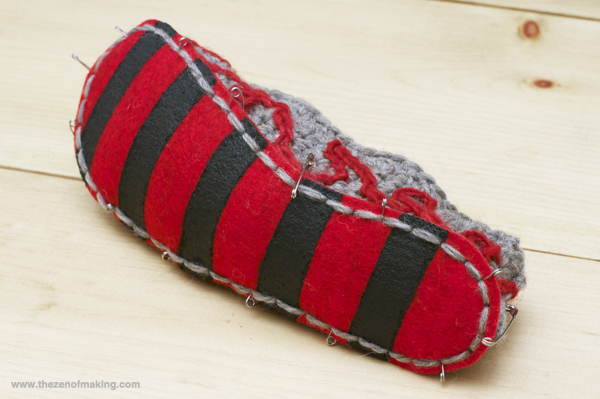
With the painted sides facing down, stretch the slippers out evenly over the soles, pinning them in place with safety pins at regular intervals.
Step 10
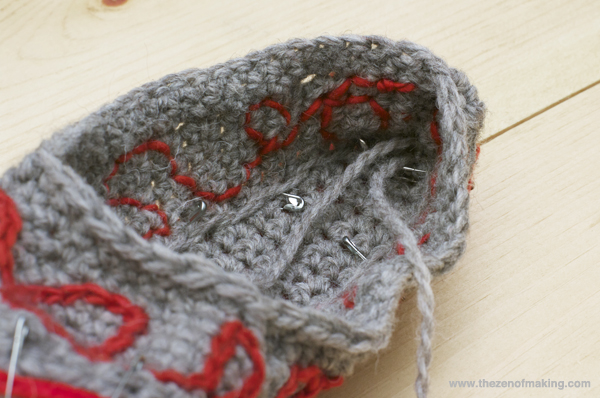
Starting on the inside of the back of the the heel, use the darning needle and yarn to backstitch through each hole, attaching the slippers to the soles. (The first stitch should start from the inside of the slipper, leaving a 3-4 inch tail.)
Step 11
Once you’ve stitched all the way around the slipper and back to the heel, pull the darning needle through to the inside of the slipper on the last stitch, then tie the two ends of yarn together. Trim any extra yarn length and weave in the ends.
You’re done! Enjoy your comfy, reinforced slippers with no-slip grips!

I just love your tutorials! everything looks so easy :-D
huge HUG!
Thank you!
Love this! I haven’t made any knitted or crocheted slippers mainly because I felt they just wouldn’t last long. But your tutorial changes everything! Thanks for sharing. Maggie xx
You’re welcome! I’ve always had the same hesitation about yarn-related footwear, so I’m really glad that I can share a solution with other makers. :)
these are seriously amazing! i found you on pinterest and am your newest reader. great blog :)
Thanks and welcome!
Great tutorial! I will follow you for a while, I did too a couple of crochet slippers, but I didn’t know how to make non-slip soles! You’ve got a great idea! And are they really original with the embroidery! Bravissima!
I was so curious about what you used for the non-skid material. Who’d have thought fabric paint was the ticket? You are a genius. I adore these, and I need new slippers. Plus, now I have an ironclad excuse to buy a leather punch, so… WIN!!
Wool has the lowest abrasion resistance of all the fibers. To sew the felt sole onto the slipper, I would suggest a yarn that has higher nylon content.
True! Thanks for sharing.
So Cool. Thank you much for sharing.
OH MY STARS!!!! I love LOVE LOVE this!!! The reason I never wear my crochet slippers is they wear through lol what a cute cute idea!!!
Thanks for this tutorial; I have crocheted various slippers but did not know how to sew on the no-slip bottoms.
This innovation is fantastic! Even though I am so appreciative of all the wonderful crochet designers who share their patterns for free on the web, I’m kind of ashamed to admit that I’ve never posted a thank-you comment before this. I can’t wait to buy the felt so that I can add soles to the slippers I’ve made. I’ll just have to temporarily take them back from the people who have gotten them as gifts!
You’re welcome! Enjoy your new soles–they’ve definitely extended the lives of my crocheted slippers. :)
Swoon! I have a pair of boot-slippers I made but I hate wearing them when I have to walk up/down stairs holding my daughter. I’m sooooo excited to go buy some felt and make a few pairs of these!
I love this idea for the slippers, that changes the crocheted or knitted slippers concept, brilliant!!
Thanks for sharing!
Lluisa x
Felicitaciones. Maravillosas y protegen del frío del piso y también al tejido. Me encantaría saber hacer las Alpargatas de tela con hilo de yute sobre la suela y es de cuñita. Las venden demaciado caras y la tela muy engomada que daña la piel.
Necesito pedirles un favor. Quiero o mas bien Necesito hacer cortinas con cenefas para la cocina (la ventana es de 3 mts ancho y alto 1.30. y para toda la casa. Si pudieran publicar ideas y como poner los cortineros.
Mil Gracias por Toda la Colaboración al Compartir tantas útiles y bellas Labores. Un Gran Abrazo con Inmenso Agradecimiento desde Venezuela.
Thanks for sharing! Simply brilliant! I’ve been casting about for leather, pleather, rubber and this is an accessible solution. Deeply appreciated.
Thanks for the tutorial! I was wondering how to make my crocheted slippers last longer, and lo! I found this. Ta!
I can not wait to do this!!! I just made slippers for my little girl and was thinking I would-be have to find some way to reinforce the soles…. Perfect! Thanks so much for the tutorial!
Many thanks for this brilliant solution to a problem I have with all my crochet slippers, not only the anti-slip aspect but also the durability. Now just wondering if it would be more long-lasting to sew the soles on with some sort of string, or twine …
When it comes to strength/durability, high quality polyester/synthetics will almost certainly hold up better than wools or cottons. If I were sewing the soles on slippers that were going to see especially heavy use, I’d probably swap out the yarn for a high quality nylon twine.
I’ve also toyed with the idea of winding some heavy duty outdoor polyester thread in with the yarn to make the stitches on the soles more durable while preserving the yarn-y aesthetics, but I haven’t tried it yet.
Love this idea! I am in the process of making slippers for friends that I will be visiting. Will the “puffy dimensional fabric paint” have the same non slip effect as the “Matte?”
So glad I found you. I can’t wait to make a pair for myself.
I haven’t tried the puffy fabric paint, but, since it dries with a rubbery finish, I’m guessing that it’d probably be okay. Maybe try a little bit on a scrap piece of felt before doing the soles?
Thanks for the tutorial. I have lots of fleece on hand, do you think this could work with fleece instead of felt?
I use felt because it gives me a sturdy, thick sole that stands up to heavy wear for much longer than slippers with plain yarn bottoms. With fleece, I’d be concerned that they’d wear through more quickly than the felt soles. That said, I haven’t used fleece, so I really don’t know for sure. If you decide to try it, I’d love to hear how it works!
I have used shelf liner on top of the felt for traction It works super. I also blanket stitch around the felt for a more finished look but the original idea of the felt soles I got from you. Thanks so much
Getting all my supplies to try this out! I would like to know the size of the leather punch. It looks like an awesome idea and I can’t wait to try it. Thank you so much for sharing!
There’s a link to the punch that I used at the top of the post. I think I used the 1/8″ setting to accommodate the yarn.
This is such a great idea – thanks for the tutorial. A lot of felts say that they aren’t machine washable….do you throw your felt bottomed slippers into the washer?
If you’re using wool felt and wool yarn, the slippers won’t be machine washable. (I hand wash all of my handmade items with Wrapture wool wash.) But, if you happen to come across some synthetic felt for the soles–and if you’ve used synthetic yarn for your slippers–you might be able to get away with machine washing.
Excellent post! I had experienced this same problem with slippers wearing through. My solution (prior to seeing your post on making soles) was to buy pre-made felt insoles from the dollar store. I had just whip stitched them to the bottoms and they have held up well, even through machine washing. I’m going to try adding some paint for non-slip treatment and dig out my leather punch for the next ones! Thanks for the great idea!
Brilliant idea with the fabric paint! I’ve tried silicon, latex and leather, but found nothing convincing or washable enough. Thanks!
Hermosa forma de hacer zoquetes ..Gracias x compartir ideas…y poder realizarlos ..Felicitaciones ..Abrazos de Argentina Angeli
The tutorial is great.How many holes according to the sole.I am confusing about the size of foot.
hi your tutorial is best but I have some confusions.1) where to start holed.2)on different sizes soles how can I make upper 3)or height of upper toe in different sizes. guide me the formula .I am a beginner . thanks
hi your tutorial is great .I have a question where is first hole start you dont mention .i purchase a rubber sole for
crochet slipper but I dont know where I start marking first hole
I love love love this idea! I’m wondering Is there any reason why I couldn’t make the sole first and then crochet my slipper right onto it, like they do with flip flop soles?
Yes, you could definitely do that! You just might want to be a bit careful with your stitch tension so it doesn’t pull the sole out of shape while you’re working.
Hi Haley, thanks for your wonderful post. One suggestion: maybe painting the fabric paint over the yarn stitches around the edges will help stop the yarn on the sole from wearing out. Also- any suggestions for where to buy 3mm felt? I have never seen it.
This is a great idea Eva!
Doesn’t the felt shrink when washed?
I wash mine the same way that I wash all of my handmade woolens–by hand with a wool-specific wash in room temp water. (If you’re looking for something potentially machine-washable, you might want to try using some synthetic felt.)