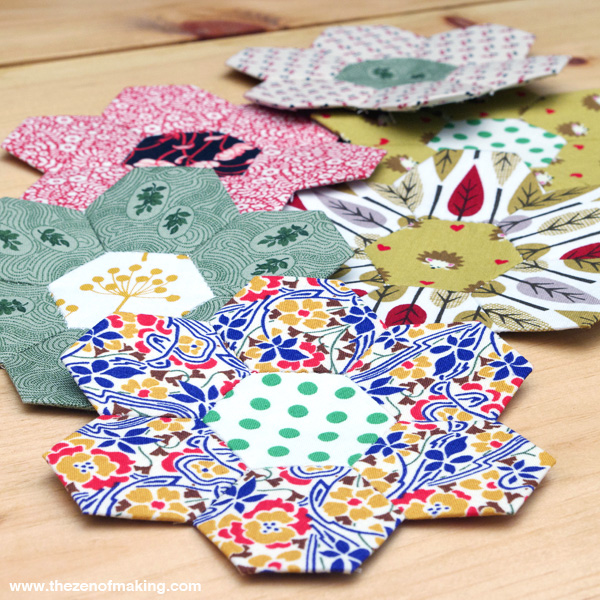
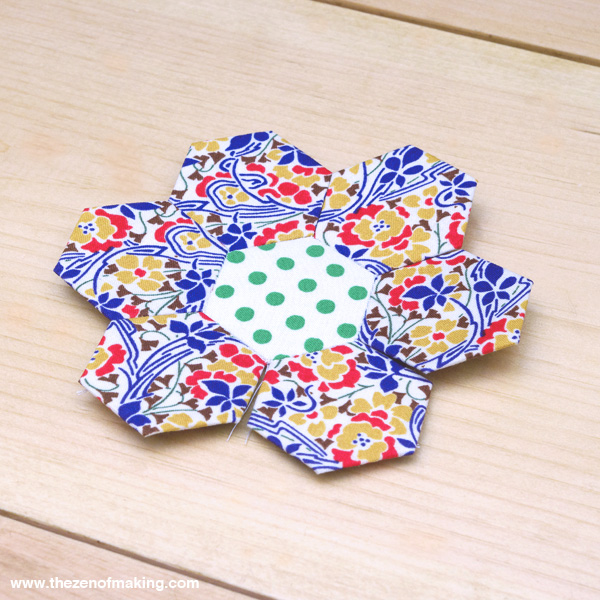
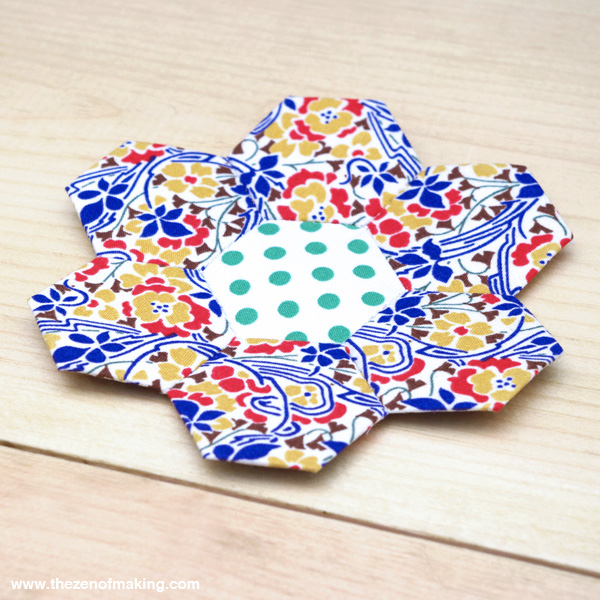
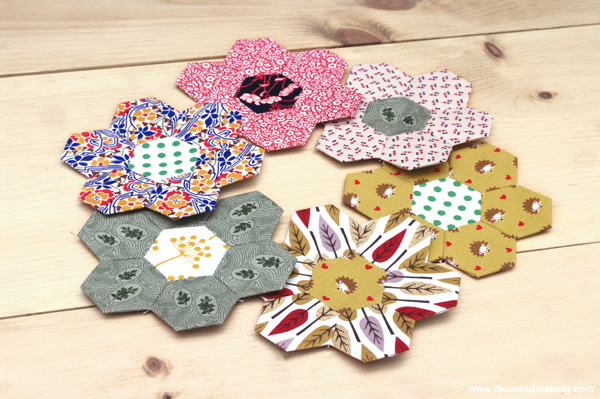
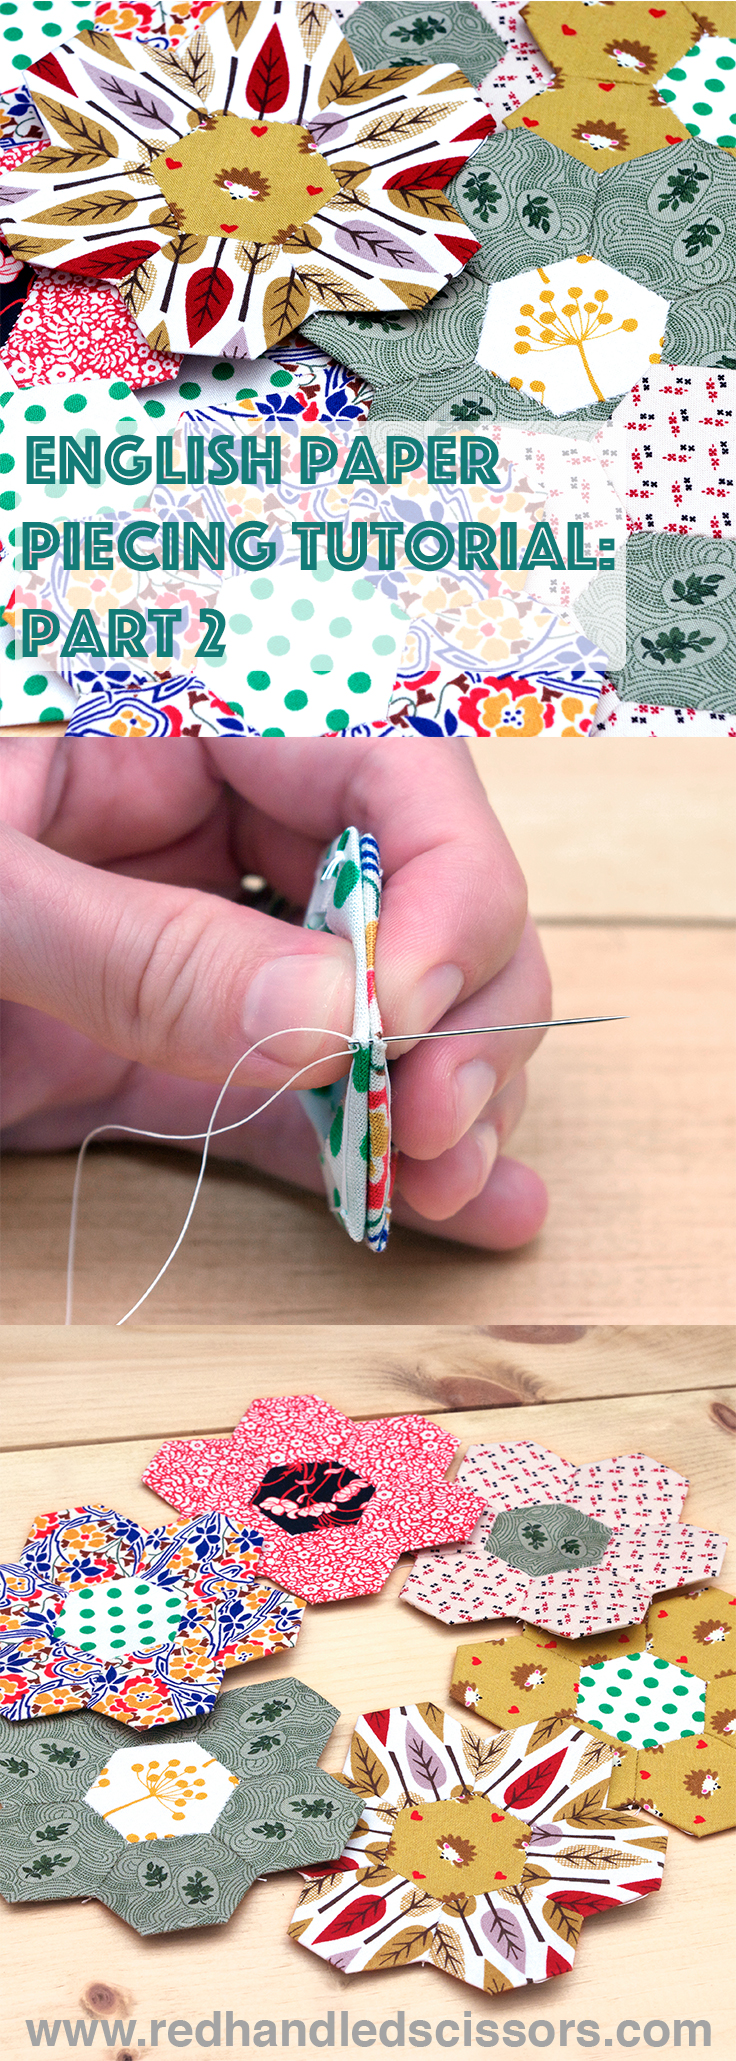
Welcome to part 2 of my English paper piecing series! In this tutorial, we’ll be joining seven of the hexagon pieces that you made in the first part of the series into a flower-shaped quilt block.
Why flowers? They’re pretty, eye-catching, and delightfully versatile. (And really easy to make.) This block can be used to make a quilt—I actually have two of those in progress right now—but that’s definitely not the only option. Even if you don’t have the time or the patience to make a full quilt, a flower block or two can make a great decorative addition to other sewing projects. Want to see them in action? In the third part of this series, I’ll show you how to incorporate the flower quilt blocks from this tutorial into a portable hexagon sewing kit. (I can’t wait!)
Before we get started, I’d like to take a moment to send out a special thank you to Diane Gilleland, who taught me the English paper piecing method that I’m now teaching you. Turns out, her hexie addiction was pretty contagious!
Please note that the links to supplies and tools that are provided below are affiliate links, and I will be compensated if you choose to make a purchase after clicking through.
Supplies:
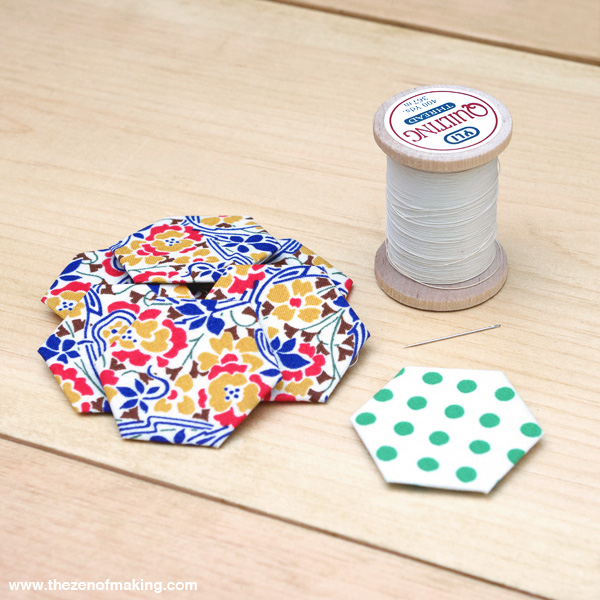
* 7 basted hexagons from Tutorial: English Paper Piecing, Hexies Part 1, six in the first color/pattern and one in a contrasting color/patern (If you’re making 2 blocks, you’ll need to double these quantities.)
* Hand quilting thread, a color that will blend in with the colors/patterns of your fabric
Tools:
* Thread snips or embroidery scissors
* Hand quilting needle
Step 1
Gather six basted hexagons in one fabric color/pattern and one basted hexagon in a contrasting color/pattern, then choose hand quilting thread in a color that will blend in well with both.
If you haven’t already basted your hexagons, head over to Tutorial: English Paper Piecing, Hexies Part 1 to see how it’s done.
Step 2
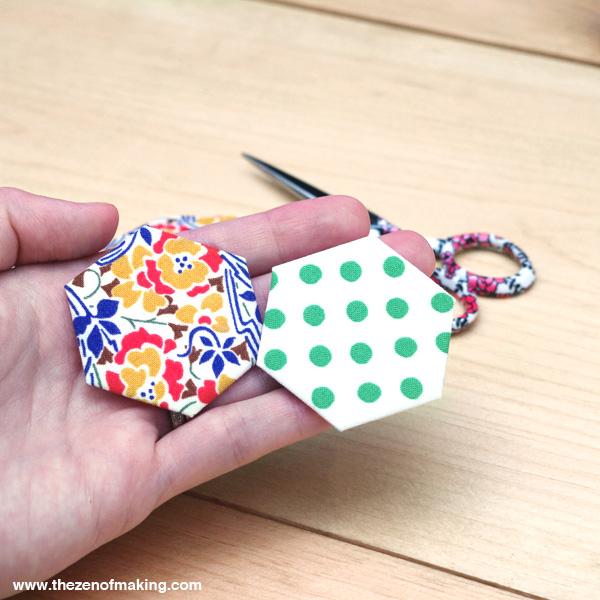
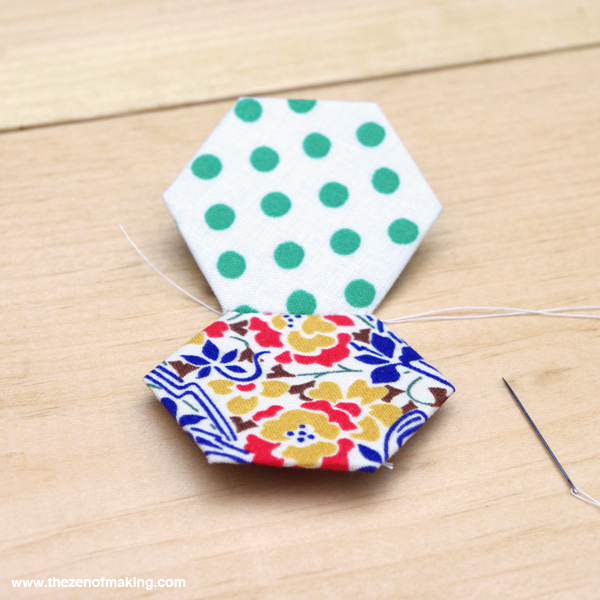
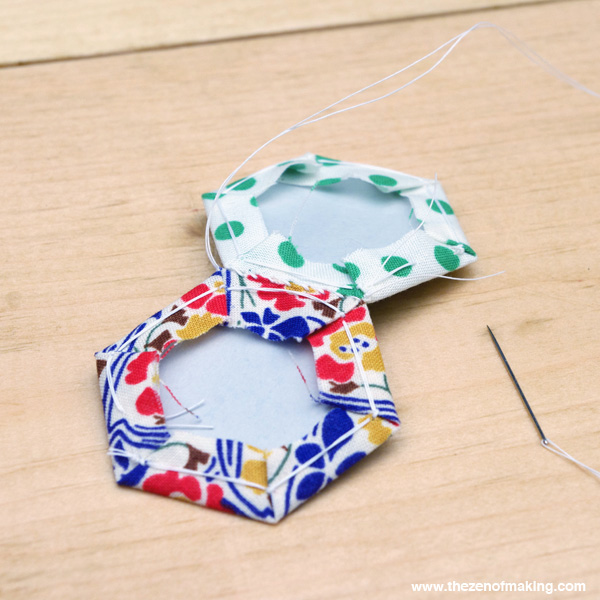
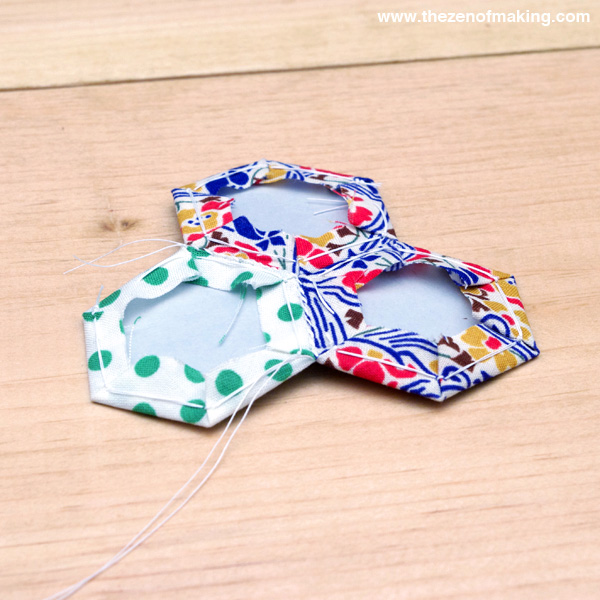
Select both the contrasting hexagon and one of the other six hexagons.
Step 3
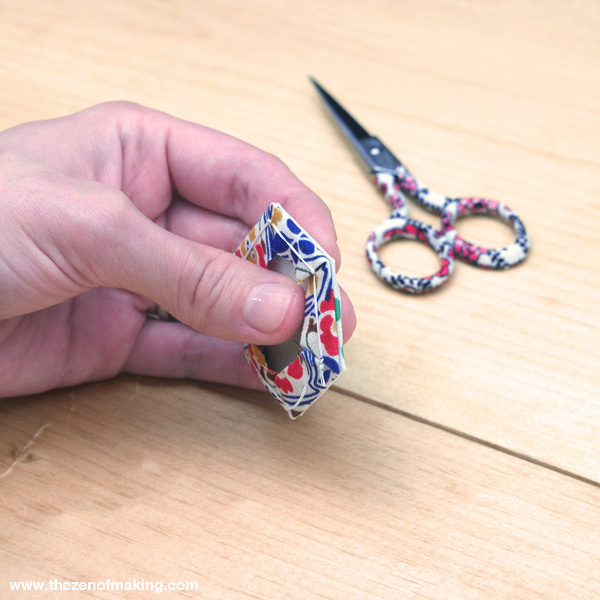
Press the two hexagons together with right sides facing, making sure that all of the corners line up.
Step 4
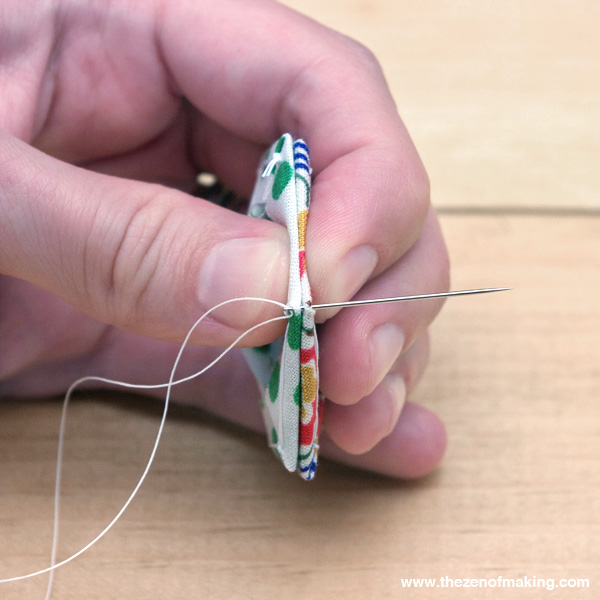
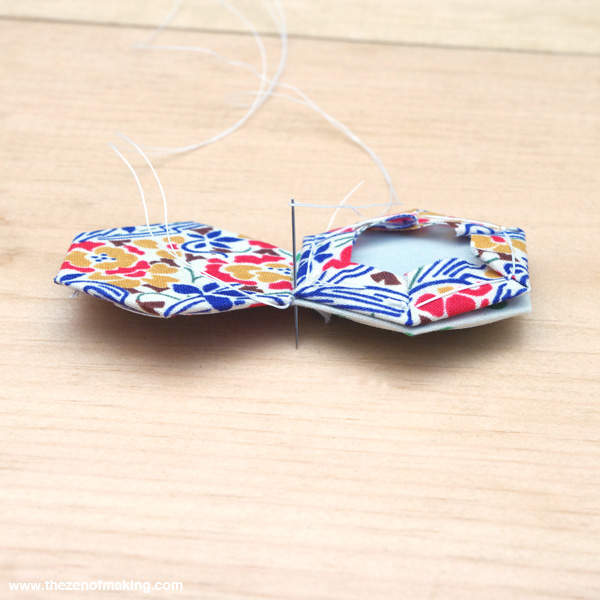
Thread your needle and knot off one end. With the two hexagons pressed together, insert the needle carefully into the point of one corner, piercing both hexagons in the same place. Pull the thread all the way through to the knot to complete the stitch.
Note: Just like when we were basting the hexagons in part 1, you should never sew through the paper template while joining the hexagons. Instead, carefully insert the needle into the fabric, then, if needed, gently feel around for the edge of the template with the tip of the needle before stitching.
Step 5
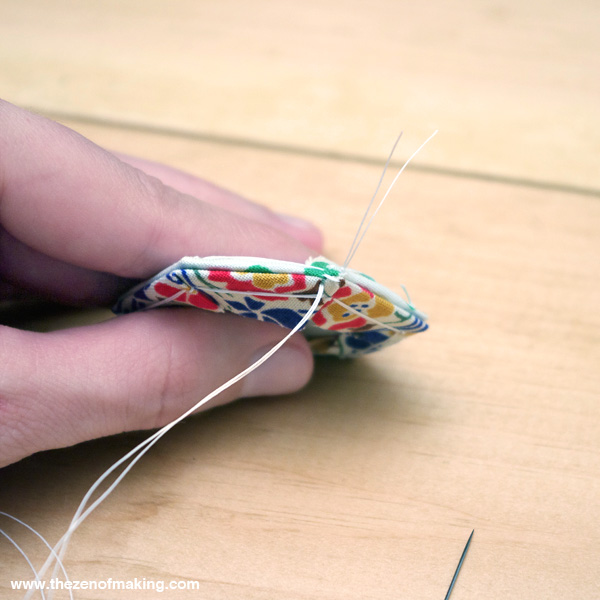
The two hexagons will be joined along one edge using very small whipstitches. After making the first stitch in the corner, move the needle over about ⅛" and insert it carefully into fabric along the edge, sewing through both hexagons but not the paper template.
Note: Keep holding the sandwiched hexagons in the same position as you stitch, always inserting the needle into the top of the stacked pieces and pulling it out through the bottom. This will wrap the stitches around the edge, joining the hexagons and creating a secure seam. For best results, the stitches should be spaced ⅛" or less apart.
Step 6
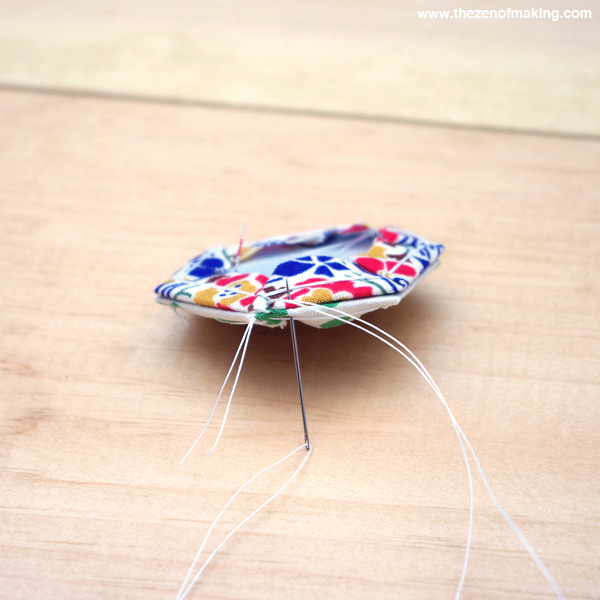
Continue whipstitching along the full length of the edge.
Step 7
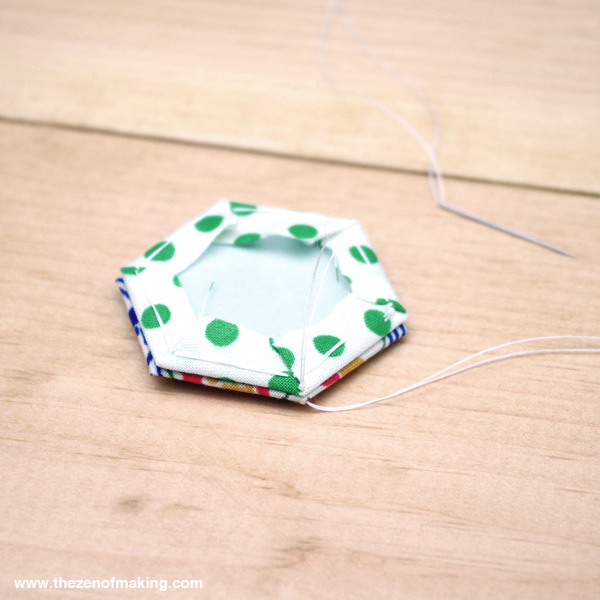
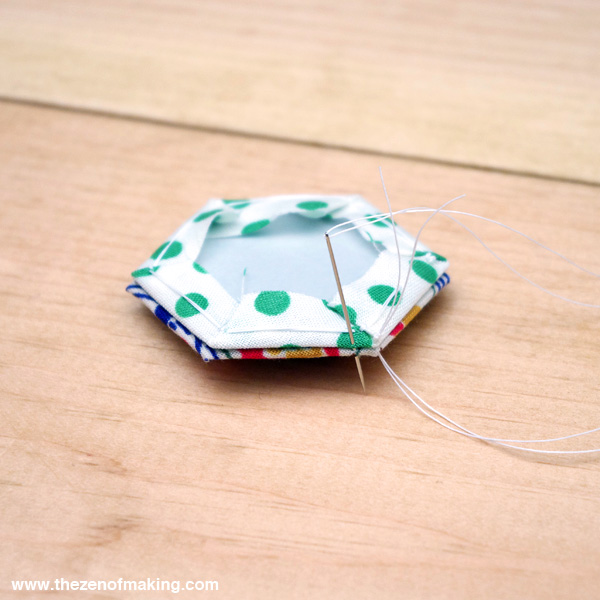
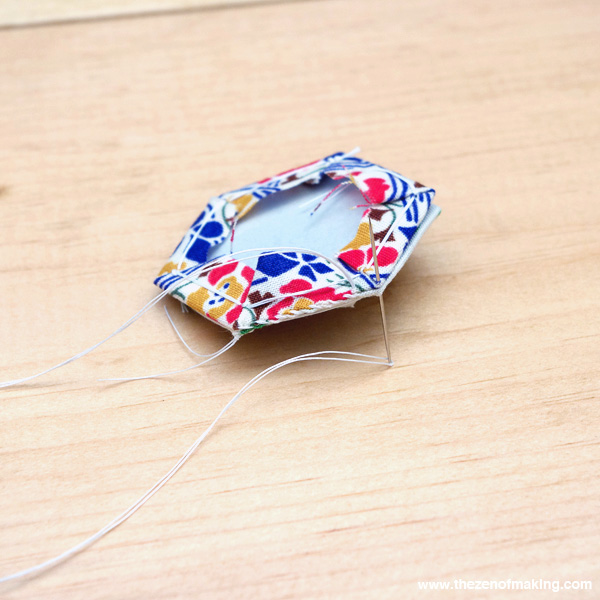
When you reach the next corner, put a neat stitch through the points, securing the corners of the two hexagons together, then knot off.
When you’re finished, your two hexagons should be securely joined along one edge and the corners at each end of that edge should be neatly aligned.
You now have the center of the flower with one attached petal.
Step 8
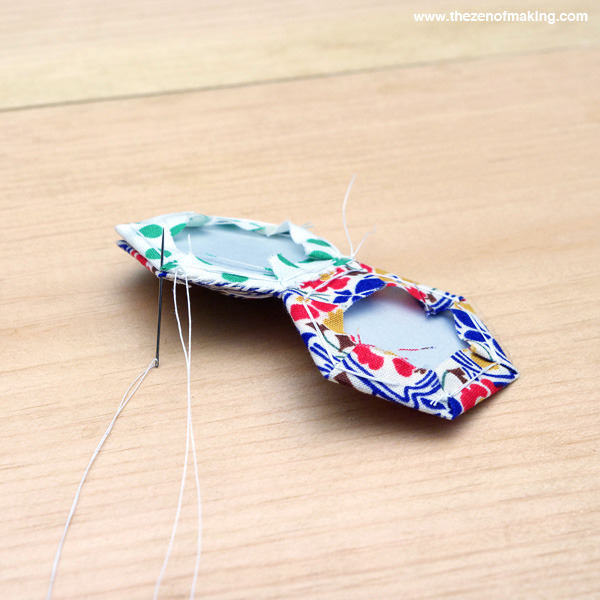
Now it’s time to add another petal to the center. To do this, select the second of your six hexagons, then place it on top of the center (contrasting) hexagon with right sides facing, making sure that all of the corners line up.
Thread your needle and knot off the end. Then, starting in the same corner where you knotted off in step 7, insert the needle into the corner of the new petal, then carefully stitch down into the same hole that you made when joining the corners of the first petal and the center hexagon. Pull the thread all the way through to complete the stitch.
Step 9
Just like in step 6, whipstitch all the way along the full length of the edge, joining the second petal to the center hexagon. To avoid confusion, your stitches should be worked in the direction that moves away from the first petal.
Once you reach the next corner, connect the points with a final stitch, then knot off.
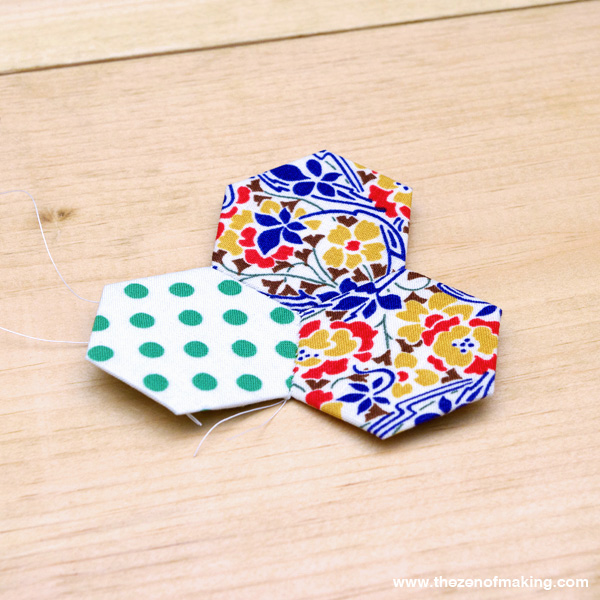
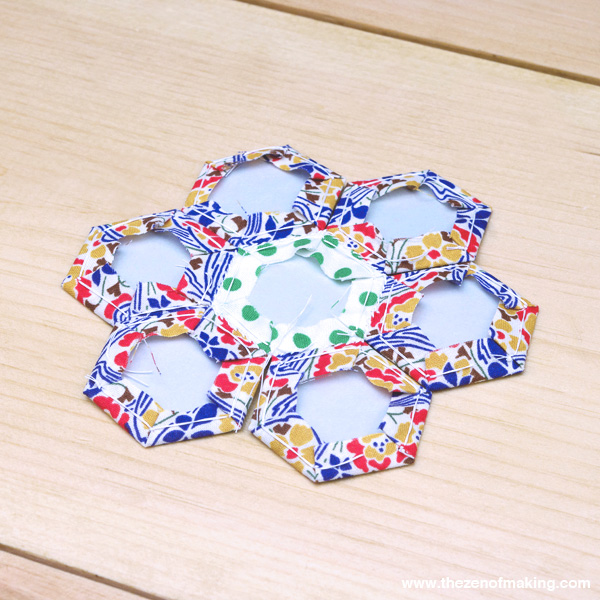
If you lay the hexagons flat, you should now have two petals joined to the center piece.
Step 10
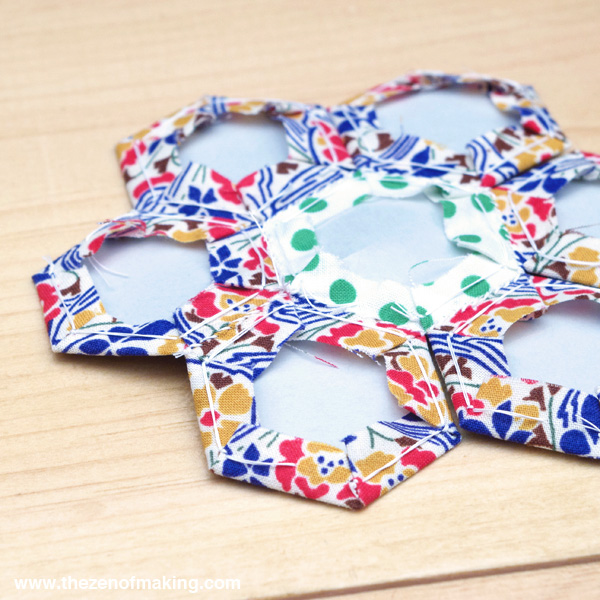
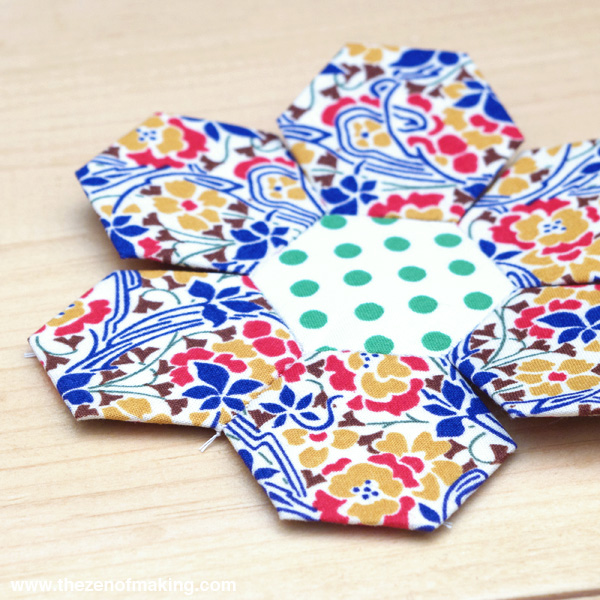
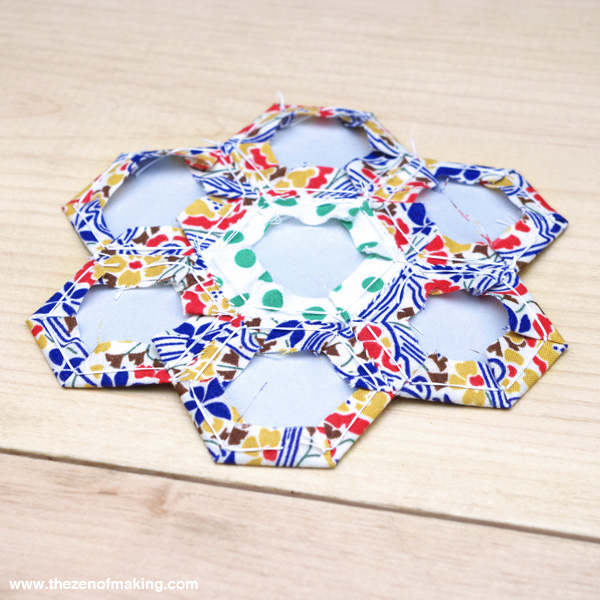
Continue joining petals to the center hexagon until you’ve attached a petal to all six edges.
Step 11
Next, we’ll join the side edges of the petals to one another to create one solid quilt block.
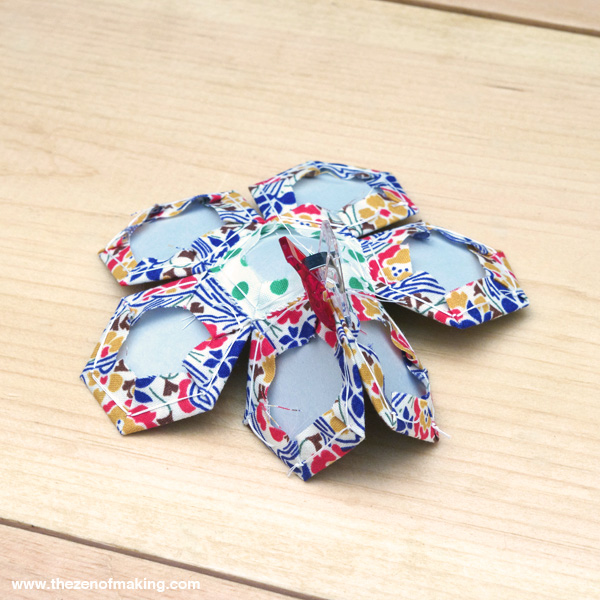
To start, with right sides facing, pinch two petals together with your fingers or a clip, aligning the corners. (It’s okay if you need to fold the paper template in the center hexagon to get the corners to line up.) Then, just like in previous steps, insert your threaded needle into the corner points (start with the points farthest from the center) and stitch through both hexagons.
Step 12
Whipstitch the two petals together along the length of the edge, working toward the center. When the center is reached, neatly stitch through all three of the corner points, connecting the seam between the two petals with the center hexagon. Knot off. (Joining the points at the center can be a little bit tricky at first, but it gets much easier with practice. Cut yourself some slack on the first few tries!)
Step 13
Continue joining the side seams of the petals together, working your way all the way around the quilt block. To finish, snip away any excess lengths of thread from the knotted areas.
Step 14
In the final part of this hexie series, we’ll be putting our finished quilt blocks to work in a portable hexagon sewing kit project. (Squee!) To get ready for part 3, you’ll need two completed flower-shaped quilt blocks.
See you then!

Another excellent job of sharing how to make hexies into a quilt block! Haven’t exactly ever really done this so all these tips and images and instructions are a huge help. Will be linking and sharing the whole series in my next “come blog reading” post. Thank you for all the hard work of putting this together.
Thanks for the kind words, and thanks in advance for sharing the series! I also really like the Grandma’s Flower Garden variation on this block–it makes for such a simple, elegant quilt top.
One thing I do when adding petals to the center, is after putting the first one on, then after sewing the next one to center hex, starting from edge away from first hex, then I go ahead at attach the second hex to the first hex. Continue until last hex, then on that one, start the sewing on outside edge connecting the previous hex, then the center, finishing up connecting to the first hex (kind of like sewing in a “U” shape). I’m a big believer in not having to stop and start my sewing as much as possible. Just makes it quicker for me. (Hope this makes sense.)
I’ll have to give this method a try. Thanks for sharing!
Girl, this is so splendid! You covered so many tips and tricks that I never see in hexie tutorials – things that make a big difference in the finished project. I love seeing a how-to this detailed, and will refer people here constantly.
Waiting with great excitement for Part 3!!
My goodness, you sure do know how to make a gal blush. So glad you like it!
I never knew what paper piecing was until now. I think I can do it! You gave such great directions. When will we get part3? How many parts are there? Thank you
Thanks for your enthusiasm, Sandra–I’m sure you can do it!
I’ll be at the Craft and Hobby Association trade show next week, so part 3 will go up when I return. At this point, I’ve only got three parts planned (making the hexagons, sewing them together, then making a finished project), but it’s possible that I’ll expand the series in the future, especially since so many people are expressing excitement about the technique.
When I do the edges that are not around the center hexy, instead of breaking thread to go to the next edge, I bend the paper until I can reach the next corner of the next edge leaving a tiny bit of slack. After I have done that edge I snip the tiny bit of slack in between. Saves me a ton of time from stopping and starting. I don’t use a double thread, I use a stronger hand quilting thread and just do a slip knot/quilter’s knot in the end. I like how you baste without going through the paper. I also love how you did a fussy-hex on some of the petals too :)
Thanks for sharing your tips! It’s funny, a friend of mine actually showed me the same method that you’re using on the very same day that you left this comment. I guess the universe really wanted me to try something new!
When I’m hand sewing, I don’t generally double the thread either, but I decided to do it in this tutorial because the thread showed up better in the detail photos that way. (Actually, I should really point this out in my tutorial–thanks for bringing it to my attention!) In my usual one-strand stitching, my go-to quilting thread is the Coats cotton hand quilting thread–it has such a nice texture and it’s so easy to use. But, if I really need strength, the waxed YLI hand quilting thread is next on my list. It’s not nearly as easy to work with–and heaven help you if you need to knot off–but I’ve never had it break on me. (And, because it comes on such a lovely wooden bobbin, I’m willing to overlook a little stiffness!)
I just checked out your blog, and I love your Green and Hexy quilt. My green fussy cut petals would be right at home!
Lovely tutorial, thank you for sharing. I am in LOVE with hexies. Best wishes, Carina
Thank you–so glad you like it!
I have made a bunch of these little hexies and loved doing it. I am not loving putting them together! Is there another way? When do we remove the paper? And how do we remove the paper?
I found this in part 3… https://www.redhandledscissors.com/2013/08/tutorial-english-paper-piecing-travel-kit-hexies-part-3/
I’m patiently waiting for part 3. :) I’m interested in making hexies, but I’ve never made one before. Looks like I might have to give it a try!
I saw a youtube video where the ladder stitch was used to join them and it is much faster. I love using it!
Excellent! I have been doing EPP for quite some time but looking for something to introduce my craft club to. This is perfect.
To start, thank you for all the good info in the tutorials. It will help me a bunch.
I am wanting to do a two color Hexie quilt regular bed size, blue print with a white center then a
Dark blue path. I have the 1″ hexies, How much yardage will I need for the quilt?
Thank you Dolores
Hi, Dolores! There are tons of great quilting calculators out there that can help you figure out your yardage:
Quilters Paradise has a good roundup of free online calculators here: http://www.quiltersparadiseesc.com/Calculators.php
And, if you have a smartphone, I really like the Robert Kaufman The Quilter’s Little Helper app: http://www.robertkaufman.com/quilting-calculators/
hi, thank you for this wonderful and very detailed tutorial. Many tutorials assume people know how to do the stitching already. I have a question, can’t I just stitch all my petals on around the middle without starting and stopping at each petal? thanks!! Diane
Hello! So glad you enjoyed the tutorial!
You can definitely stitch all of the petals around the middle without knotting off after each petal–I just showed knotting off after each one in the tutorial for simplicity sake. (If you attach all of the petals with one long thread, be careful to pull the thread tight between petals so you don’t end up with any gaps.)
This looks simple enough… for those of us who are inexperienced – I’m assuming that the paper should, at some point be removed?
NM… lol! I found it in part 3.
I wish I could print the written instructions. It’s very difficult on a phone scrolling through these instructions because they are sooo long. One of the pictures did not match what the instructions said, for instance in the photograph it was already sewn, but the instructions didn’t tell me to sew that yet, so I just went ahead & sewed it because it was sewn in the picture & caused myself a little bit of an issue. I also wish there were photographs of step by step when Folding it. Thanks!
Hi! If you’d like to print the tutorial, there’s a print button at the bottom, next to the sharing buttons. It also sounds like you might have missed the first post in the tutorial series, which covers folding the fabric over the template and basting the fabric in place: https://www.redhandledscissors.com/2013/06/tutorial-english-paper-piecing-hexies-part-1/
Hope that helps!
Just found your hexie travel kit, thank you
I have wanted to do the EEP for a long time. I found your tutorials the best I found online. I just found the directions for printing. That helped SO MUCH. I am a visual learner. I hate to just sit and do nothing. I live in Florida and knitting isn’t the best past time. This is so helpful. Thank you so much.
That’s awesome! I hope you have a great time stitching!